How to Make a Perfect Barbie Cake
Creating a Barbie cake is not only a delightful experience but also an incredibly rewarding one. It’s an ideal choice for birthdays, parties, or any special occasion where you want to make someone smile. In this detailed guide, you’ll learn how to make a beautiful Barbie cake that not only looks impressive but tastes delicious too. Let’s get started!
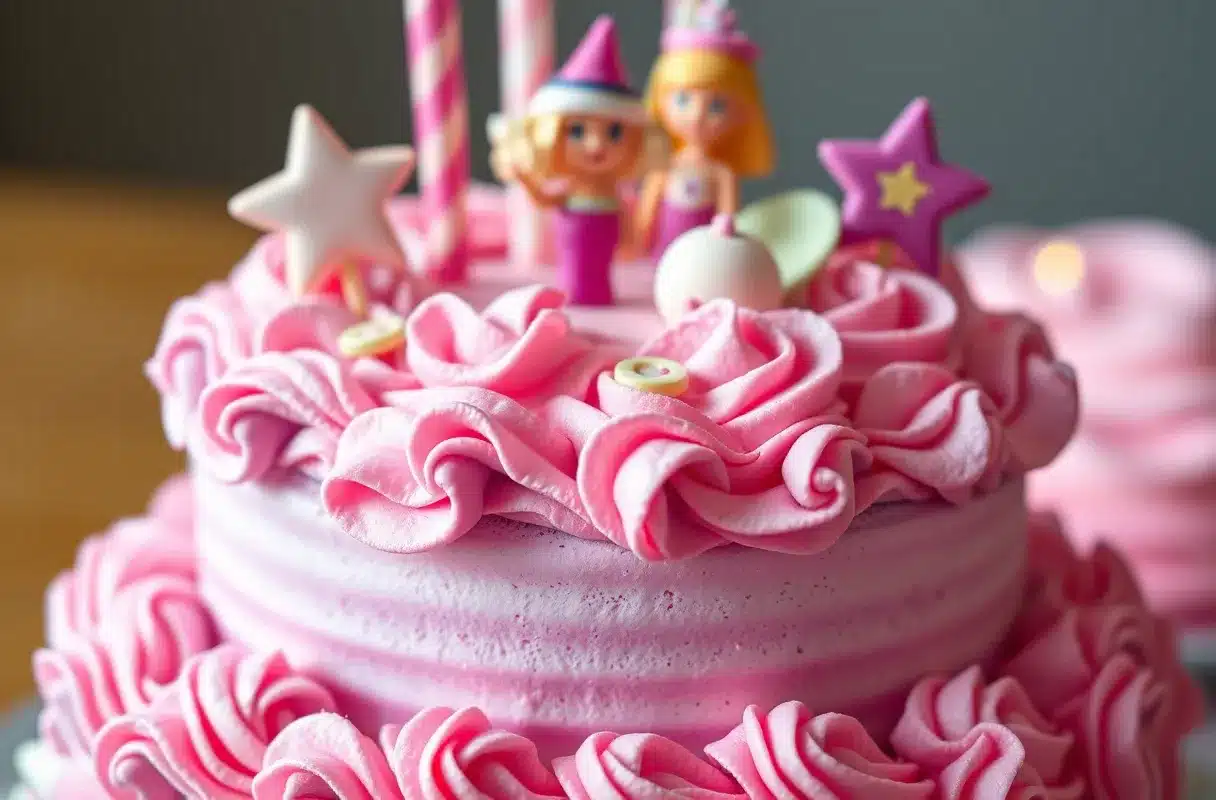
Barbie Cake
Making a Barbie cake is a fun and creative way to celebrate special occasions, especially for young children who love Barbie. This cake features a real doll in the middle, and her skirt is the delicious cake itself! In this article, we’ll cover all the essential tips and steps you need to bake, assemble, and decorate the perfect Barbie cake. Whether you are a beginner or have some baking experience, this guide will simplify every step for you.
A Barbie cake is more than just a cake—it’s an artistic masterpiece that brings imagination to life. The following sections will provide comprehensive instructions, from preparing the ingredients to adding the finishing decorative touches.
Ingredients Needed for Barbie Cake
To make the perfect Barbie cake, you will need the following ingredients. Make sure to have all the ingredients ready before you begin baking:
Cake Ingredients
- 3 cups of all-purpose flour
- 2 1/2 cups granulated sugar
- 1 cup unsalted butter (room temperature)
- 4 large eggs
- 1 1/2 cups whole milk
- 1 tablespoon vanilla extract
- 2 teaspoons baking powder
- 1/2 teaspoon salt
- 1/2 cup vegetable oil
Frosting Ingredients
- 2 cups unsalted butter (room temperature)
- 5 cups powdered sugar
- 1/4 cup heavy cream
- 2 teaspoons vanilla extract
- Gel food coloring (optional)
Optional Decorations
- Edible glitter
- Fondant flowers
- Edible pearls
- Sprinkles
- Piping gel
Equipment Needed for Barbie Cake
To make this Barbie cake, you will need the following tools:
- Large mixing bowl
- Hand mixer or stand mixer
- Measuring cups and spoons
- Mixing spatula
- Cake pans (a large dome-shaped pan is ideal for the skirt)
- Cake stand
- Barbie doll (ensure it is clean)
- Serrated knife
- Offset spatula
- Piping bags and piping tips
- Rolling pin (for fondant decorations)
- Turntable (optional, but helpful for decorating)
Preparing the Barbie Cake Batter
Step 1: Preheat and Prepare the Cake Pans
Preheat your oven to 350°F (175°C). Grease and flour the cake pans to ensure easy removal once the cake is baked. You may use a large dome pan and a smaller round pan to create layers that resemble the Barbie’s gown.
Step 2: Mix Dry Ingredients
In a large mixing bowl, sift together the all-purpose flour, baking powder, and salt. Sifting helps to eliminate any lumps and ensures that your cake has a soft and even texture.
Step 3: Cream the Butter and Sugar
In another large bowl, beat the unsalted butter and granulated sugar using a hand mixer or stand mixer. Mix until the mixture turns light and fluffy. This will usually take about 3-5 minutes. Creaming butter and sugar helps to incorporate air, which results in a lighter cake.
Step 4: Add Eggs and Oil
Add the eggs, one at a time, into the butter-sugar mixture. Beat well after each addition to ensure they are fully incorporated. Then add the vegetable oil and mix until smooth. The oil helps to keep the cake moist.
Step 5: Combine Wet and Dry Ingredients
Gradually add the dry ingredients into the wet mixture, alternating with the whole milk. Start and end with the dry ingredients. Mix until just combined, being careful not to overmix. Overmixing can lead to a dense cake.
Step 6: Add Vanilla Extract
Stir in the vanilla extract until evenly distributed. The vanilla extract will add a rich, aromatic flavor to the Barbie cake.
Step 7: Pour and Bake
Pour the batter into the prepared cake pans. Fill each pan about 3/4 full to leave room for the cake to rise. Bake in the preheated oven for 30-35 minutes or until a toothpick inserted in the center comes out clean. Once baked, let the cakes cool in the pans for 10 minutes, then transfer them to a wire rack to cool completely.
Assembling the Barbie Cake
Step 1: Level the Cakes
Using a serrated knife, level the tops of the cooled cakes. This helps to create an even surface for stacking. Leveling is essential for the stability of your Barbie cake.
Step 2: Stack and Carve the Layers
Place the largest cake layer on a cake stand. Spread a thin layer of frosting on top to act as glue. Stack the smaller cake on top and continue until all layers are stacked. Once the layers are in place, carve the stacked cake into the shape of a dome or skirt. The goal is to create a natural gown-like shape for the Barbie doll.
Step 3: Insert the Barbie Doll
Wrap the Barbie doll’s lower half with plastic wrap to protect it from the cake. Insert the doll into the center of the carved cake, ensuring that it is positioned securely. If the doll is too tall, you may need to remove its legs to fit.
Step 4: Crumb Coat the Cake
Apply a thin layer of frosting over the entire cake, also known as a crumb coat. This helps to trap any loose crumbs and provides a smooth base for the final frosting. Chill the cake in the refrigerator for 15-20 minutes to set the crumb coat.
Decorating
Step 1: Prepare the Frosting
To make the buttercream frosting, beat the unsalted butter until creamy. Gradually add the powdered sugar and continue mixing until smooth. Add the heavy cream and vanilla extract, beating until fluffy. If desired, add gel food coloring to create different colors for the gown.
Step 2: Frost the Cake
Use an offset spatula to evenly spread the frosting over the cake. You can use different colors to create layers and details, resembling Barbie’s gown. Smooth the surface of the frosting as much as possible for a polished look.
Step 3: Add Decorative Details
Place the buttercream in piping bags fitted with different tips. Pipe ruffles, flowers, or other designs onto the gown. Adding different piping styles will make the Barbie cake look elegant and detailed.
Step 4: Add Final Touches
You can add edible glitter, pearls, or fondant decorations to enhance the beauty of the Barbie’s gown. Be creative and customize it according to the recipient’s favorite colors and style.
Step 5: Fondant Decorations
If you want to add more intricate decorations, consider using fondant. Roll out the fondant using a rolling pin and cut it into shapes like flowers, bows, or ribbons. Place these decorations on the cake to give it a more professional look. Fondant can also be used to create a bodice for the Barbie doll to match the gown.
Creative Variations
Ombre Barbie Cake
An ombre Barbie cake adds a beautiful gradient effect to the gown. To achieve this, divide the frosting into several bowls and add increasing amounts of food coloring to each bowl. Start with the lightest shade at the top of the gown and gradually work your way down to the darkest shade. This effect is visually stunning and adds an elegant touch to the cake.
Floral Barbie Cake
For a floral Barbie cake, use piping tips to create buttercream flowers on the gown. You can mix different colors for a vibrant and realistic floral effect. Add edible leaves and petals to complete the look. This style is perfect for spring or garden-themed parties.
Princess-Themed Barbie Cake
Transform your Barbie cake into a princess-themed cake by adding a tiara and wand. Use fondant to create a small crown that fits on Barbie’s head, and decorate the gown with gold or silver accents. This variation is perfect for any child who loves princesses.
Common Mistakes to Avoid When Making a Barbie Cake
Overmixing the Batter
Overmixing the cake batter can lead to a dense and tough cake. Be sure to mix the ingredients until they are just combined. This will help keep your cake light and fluffy.
Uneven Cake Layers
Uneven cake layers can cause the cake to lean or become unstable. To avoid this, make sure to level each layer before stacking. Use a serrated knife or a cake leveler for the best results.
Frosting Too Warm
If your frosting is too warm, it may become runny and difficult to work with. Always use room-temperature butter and allow the cake to cool completely before frosting. You can also chill the frosting for a few minutes if it becomes too soft.
Not Securing the Barbie Doll
If the Barbie doll is not secured properly, it may shift or lean during transportation. To avoid this, make sure the doll is inserted deeply into the cake and that the cake layers are stable. You can also use a wooden dowel for added stability.
Storing and Transporting
Storing the Cake
To store a Barbie cake, cover it loosely with plastic wrap and keep it in the refrigerator. The cake can be stored for up to three days. Before serving, allow the cake to come to room temperature for the best flavor and texture.
Transporting the Cake
Transporting a Barbie cake requires extra care due to its height and intricate decorations. Place the cake on a sturdy cake board and use a non-slip mat underneath to prevent it from sliding. Transport the cake in a box that is tall enough to accommodate the Barbie doll without touching the decorations. Drive slowly and avoid sudden stops or sharp turns.
Flavor Ideas
Classic Vanilla Barbie Cake
A vanilla Barbie cake is a timeless choice that appeals to everyone. The light and fluffy vanilla flavor pairs perfectly with almost any frosting and decoration, making it a versatile option for any occasion.
Chocolate Barbie Cake
For chocolate lovers, a chocolate Barbie cake is the perfect choice. Rich and moist chocolate layers combined with a smooth buttercream frosting create a decadent treat that everyone will enjoy. You can even add chocolate chips for extra texture.
Strawberry Barbie Cake
A strawberry Barbie cake is a great option for those who love fruity flavors. Use fresh strawberries in the batter and frosting for a natural and refreshing taste. The pink color of the strawberries also complements the Barbie theme beautifully.
Funfetti Barbie Cake
A funfetti Barbie cake is a festive and colorful option that is perfect for children’s parties. Add rainbow sprinkles to the batter for a burst of color in every slice. The funfetti cake pairs well with vanilla buttercream and colorful decorations.
Conclusion:
Making a Barbie cake may seem like a challenge, but with the right steps and a little creativity, it becomes a fun and fulfilling project. This cake is perfect for any Barbie fan and makes an eye-catching centerpiece at parties. With a moist cake base, creamy frosting, and beautiful decorations, this Barbie cake will surely be a showstopper.
Whether you’re a beginner or an experienced baker, following this guide step-by-step will help you achieve a stunning result. Remember to have fun, be patient, and most importantly—enjoy the process!
Frequently Asked Questions (FAQs)
How Long Does It Take to Make a Barbie Cake?
The time required to make a Barbie cake can vary depending on your experience level. Generally, it takes about 4-6 hours, including baking, cooling, carving, and decorating.
Can I Use a Different Cake Flavor?
Absolutely! You can use any cake flavor for your Barbie cake. Vanilla, chocolate, and strawberry are all great options.
How Do I Store a Barbie Cake?
You can store a Barbie cake in the refrigerator for up to three days. Cover it with plastic wrap or place it in an airtight container to prevent it from drying out.
Can I Make the Barbie Cake Ahead of Time?
Yes, you can bake the cake layers a day in advance. Wrap them in plastic wrap and store them at room temperature or in the refrigerator. Assemble and decorate on the day of the event for the best results.
What If I Don’t Have a Dome Cake Pan?
If you don’t have a dome cake pan, you can stack several round cakes and carve them into a dome shape. It’s an easy and effective workaround.
Check this delicious recipe here .
-
Brazilian Mounjaro: A Tropical Delight
Ever feel like your dessert routine needs a tropical twist? Imagine indulging in a delightful treat that transports you to the vibrant streets of Brazil with every bite. Introducing the … Learn more Here
-
Microwave Tanghulu: Easy & Fun to Make in Minutes!
Tanghulu is one of those treats that look fancy but are secretly super easy to make—especially when you ditch the stovetop and use the microwave tanghulu method! No more messy … Learn more Here
-
Gluten-Free Monkey Bread
magine waking up to the sweet, buttery aroma of warm, pull-apart bread fresh from the oven. But wait—what if you need to skip the gluten? No worries! This gluten-free monkey … Learn more Here


